
How to Swap Your Audi A1 Radiator Like a Pro
Introduction
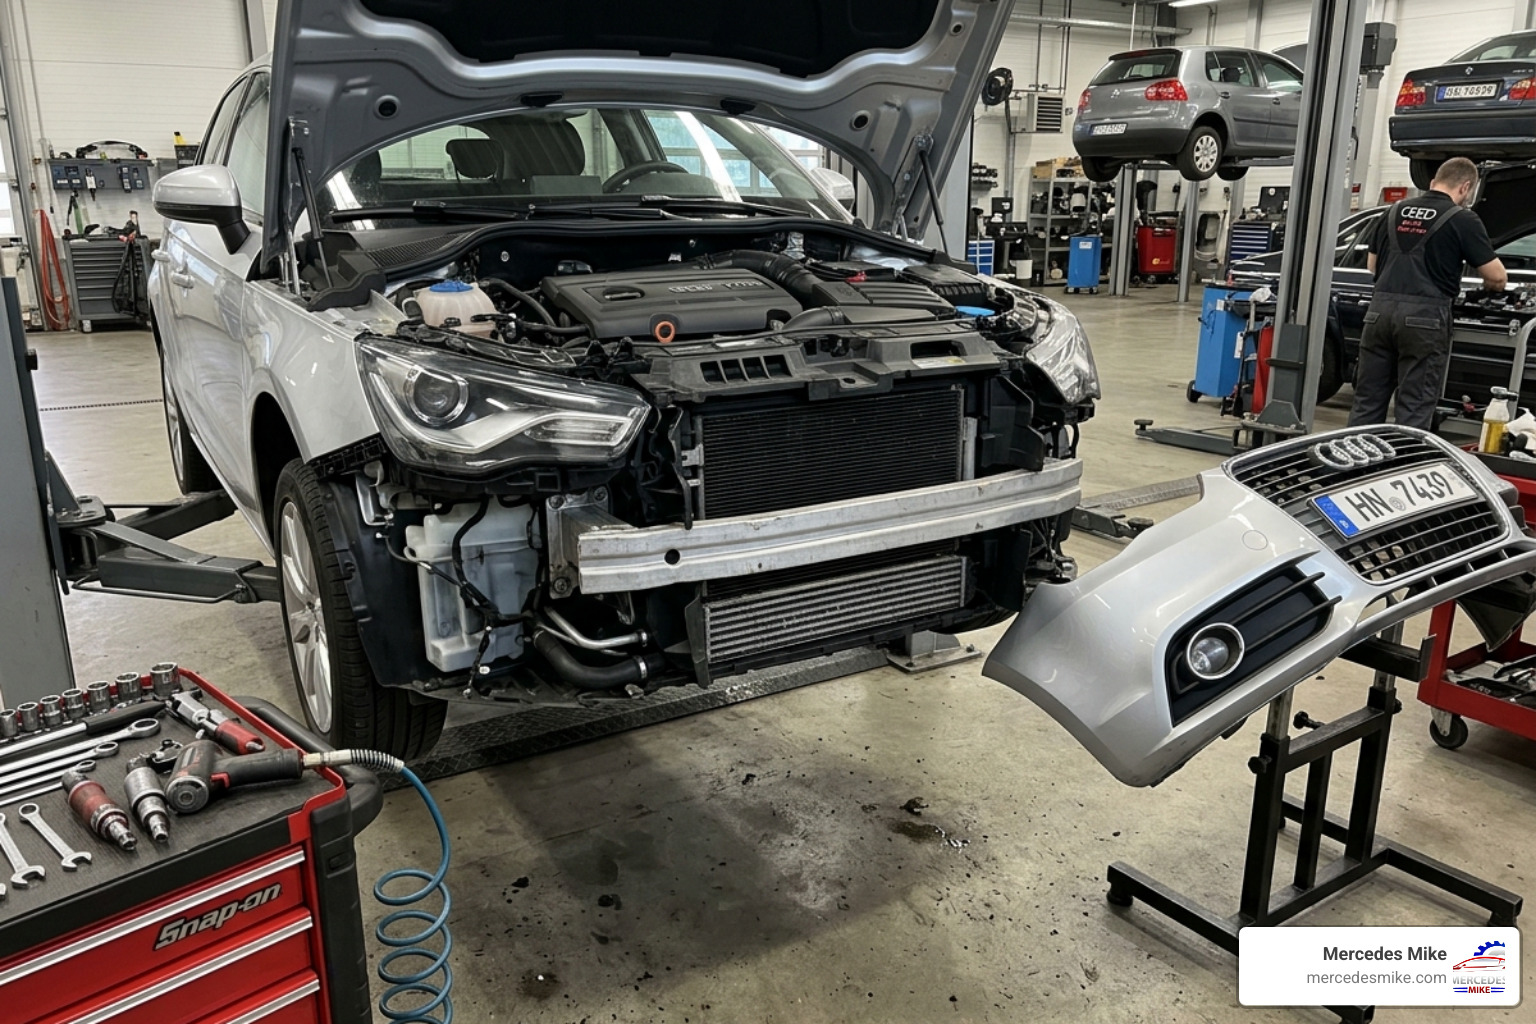
The Audi A1 is a marvel of German engineering, packing a lot of performance into a compact footprint. However, that compact design means that the engine bay is incredibly tight. When it comes to an audi a1 radiator replacement, you aren't just popping the hood and swapping a part; you are performing a bit of "open-heart surgery" on the front of your vehicle. Whether you are dealing with a 1.2L petrol or the punchy 1.6 TDI, the cooling system is the lifeblood of your engine's longevity.

Signs You Need an Audi A1 Radiator Replacement
Knowing when to pull the trigger on a replacement can save you from a catastrophic engine meltdown. At Mercedes Mike, we often see A1s coming in with symptoms that could have been addressed much earlier.
Puddles on the Pavement: If you notice bright pink or orange fluid (standard Audi G12/G13 coolant) pooling under the front bumper, you likely have a leak. On the 1.6 TDI models, leaks are common near the bottom near-side corner.
Engine Overheating: If your temperature gauge is climbing into the red or you get a dashboard warning, your radiator may no longer be dissipating heat effectively due to internal clogs or external debris damage.
Discoloured Coolant: Healthy coolant is translucent. If yours looks like "latte" or contains dark flakes, it’s a sign of internal corrosion or oil contamination.
Cracked Plastic Tanks: Modern radiators use aluminum cores crimped to plastic end tanks. Over time, heat cycles make this plastic brittle, leading to hairline cracks.
Debris and Corrosion: Because the A1 sits low to the ground, the radiator is a magnet for road salt, grit, and stones. A low-speed bump or a large stone flicked up by a truck can easily puncture the delicate fins.
To understand why these issues occur, you can read more about The Most Common Problems with German Cars and How to Prevent Them. If you suspect a leak but can't see it, a pressure test is the best way to confirm the radiator's integrity before you start taking the car apart.

Essential Tools and Preparation
Before you start, make sure you have everything on hand. There is nothing worse than having your bumper off and realizing you’re missing a specific Torx bit.
Required Tools:
Torx Bits: You will need T20 and T30 Torx drivers for the bumper and trim screws.
5mm Allen Key: Used for various mounting fasteners.
Flathead Screwdriver: For prying clips and assisting with hose removal.
Hose Clip Pliers (VAS 6362): Audi uses specific spring-style clips. While standard pliers can work, the professional VAS 6362 tool makes this much safer and easier.
Drip Tray (VAS 6208): To catch the coolant. Coolant is toxic and should never be poured down the drain.
Engine Bung Set (VAS 6122): Useful for sealing off open pipes to prevent debris from entering the system.
Materials:
Replacement Radiator: Ensure it matches your engine (e.g., 1.2L vs 1.6 TDI).
G12++ or G13 Coolant: You will need several liters of fresh Audi-spec antifreeze.
Distilled Water: To mix with the coolant (usually a 50/50 ratio).
Preparation:
Safety First: Ensure the engine is completely cold. Opening a hot cooling system can cause severe burns.
Battery Disconnect: Disconnect the negative terminal to prevent any electrical shorts while unplugging fans and sensors.
Lift the Vehicle: While not strictly necessary, putting the front on jack stands gives you better access to the under-tray screws.
For technical enthusiasts, you can reference the Audi Workshop Service and Repair Manuals for the 1.2L petrol engine to see the official assembly diagrams.
Step-by-Step Audi A1 Radiator Replacement Procedure

As we mentioned, the front bumper must come off. It sounds daunting, but it’s a standard procedure for almost all Audi services.
Remove the Front Bumper: Undo the screws in the wheel arches, the top of the grille, and along the bottom under-tray. Carefully pull the bumper forward, unplugging the fog lights and parking sensors as you go.
Remove the Radiator Cowl: This is the plastic ducting that directs air into the radiator.
Drain the Coolant: Place your drip tray under the lower radiator hose. Release the clip and pull the hose back. Pro Tip: Coolant will still spill out even after draining, so keep that tray handy!
Disconnect Hoses: Use your hose clip pliers to remove the upper and lower hoses. Audi hoses often have "interlocking notches" — pull them straight off rather than twisting them to avoid damaging the plastic fittings.
Unplug Electricals: Disconnect the wiring harness for the radiator fans (usually located at the bottom or side of the fan shroud).
Handling the A/C Condenser During Audi A1 Radiator Replacement
This is the most critical step. The A/C condenser sits directly in front of the radiator.
Do Not Disconnect the A/C Lines: You do not want to release the refrigerant. Not only is it illegal to vent it into the atmosphere, but it also adds the cost of an A/C recharge to your bill.
The Move and Secure Method: Remove the bolts holding the condenser to the radiator. Gently move the condenser forward. Use cable ties to secure it to the lock carrier so it doesn't hang by the refrigerant lines. Be extremely careful not to kink or stretch these lines. For more on cooling and AC interactions, see our guide on Radiator Repair and Service.
Managing the Intercooler and Charge Air Cooler
Depending on your engine (especially the 1.2L turbo and 2.0 TDI), you may have a charge air cooler (intercooler) sandwiched in there as well.
On the 2.0 TDI, the radiator and charge air cooler are often removed together or require the intercooler to be detached first.
Follow the Audi Workshop Manual for the 2.0 TDI to ensure you release the specific mounting clips for the air ducts.
Once the condenser and intercooler are clear, remove the main radiator mounting bolts and lift the unit up and out of its bottom support holes.
Reassembly and Coolant Refilling
Installation is largely the reverse of removal, but "the devil is in the details."
Seating the Radiator: Ensure the rubber mounting lugs at the bottom of the new radiator seat perfectly into the holes in the subframe.
O-Ring Inspection: Check the O-rings inside the coolant hoses. If they look flattened or cracked, replace them. A "double O-ring" (where the old one stays stuck on the radiator) is a common cause of leaks after a DIY job.
The Soapy Water Trick: If a hose is stubborn and won't slide onto the new radiator, a little soapy water on the fitting can act as a lubricant.
Torque Specs: While many DIYers "hand-tighten," professional shops use specific torques. Generally, M6 bolts for the radiator should be tightened to about 5-8 Nm.
Transmission Lines: If you have an automatic (S-tronic) model, the radiator may also cool the transmission fluid. Be careful when reconnecting these lines; use a flathead screwdriver to gently seat the clips and ensure the O-rings are lubricated.
Refilling and Bleeding: Mix your G12/G13 coolant with distilled water. Fill the expansion tank slowly. Start the engine with the heater on "high" to open the thermostat. As the engine warms up, "burp" the system by squeezing the radiator hoses to move air bubbles toward the tank.
For more maintenance tips, check out our Blog.
Cost and Time Expectations in April 2026
In April 2026, the costs for an audi a1 radiator replacement have remained relatively stable but vary significantly between DIY and professional services.
Service Provider Estimated Cost (Parts + Labour) DIY (Parts Only) £80 – £170 Independent Garage £180 – £264 Franchise Dealer £358 – £482
Labour Time: A professional mechanic usually takes between 2 and 3 hours. For a first-timer doing this at home, expect to spend at least 4 to 5 hours given the bumper removal hassle.
Sourcing Parts: You can find affordable options by looking for Used Audi A1 radiators and radiator parts, which can save you up to 80% off dealer prices. However, for a critical cooling component, we generally recommend a new OEM or high-quality aftermarket unit (like Hella or Fenix) to ensure the plastic tanks are fresh.

Frequently Asked Questions about Audi A1 Radiator Replacement
Does the front bumper need to be removed to access the radiator?
Yes. Unlike older cars where the radiator might slide out the top, the Audi A1's tight packaging requires the bumper to be removed to access the mounting bolts and to clear the A/C condenser and intercooler. There is no "service position" shortcut that avoids this.
How long does a typical audi a1 radiator replacement take?
For a professional, it's a 2.5-hour job. For a DIYer, it's a half-day project. The majority of the time is spent carefully removing and re-aligning the front bumper and bleeding the air out of the cooling system afterward.
What coolant should I use for my Audi A1?
You must use Audi-approved coolant, typically G12++ or G13 (usually pink or purple). Do not mix this with "universal" green or blue antifreeze, as this can lead to "sludging" which will clog your new radiator and potentially damage your water pump.
Conclusion
Performing an audi a1 radiator replacement is a rewarding but "fiddly" job. While removing the bumper is a bit of a hassle, following the steps methodically ensures your Audi stays cool under pressure. At Mercedes Mike, we specialize in exactly this kind of precision work. Our decades-experienced technicians in Pompano Beach have the latest tools to handle everything from a 1.2L petrol to a 2.0 TDI.
If you’re in South Florida—whether in Deerfield Beach or Pompano—and you’d rather have the pros handle the "hassle" for you, we are here to help. We treat every Audi with the care it deserves, ensuring every clip and O-ring is perfect.
Ready to get your cooling system back in top shape? Contact Us today or learn more About Us and our Professional Audi Radiator Services.