
How to Fix a Light Switch Without Calling an Electrician
When Your Light Switch Stops Working: What You Need to Know First
Fix a light switch yourself in just a few steps — no electrician required for most common problems.
Here's a quick overview of what the process looks like:
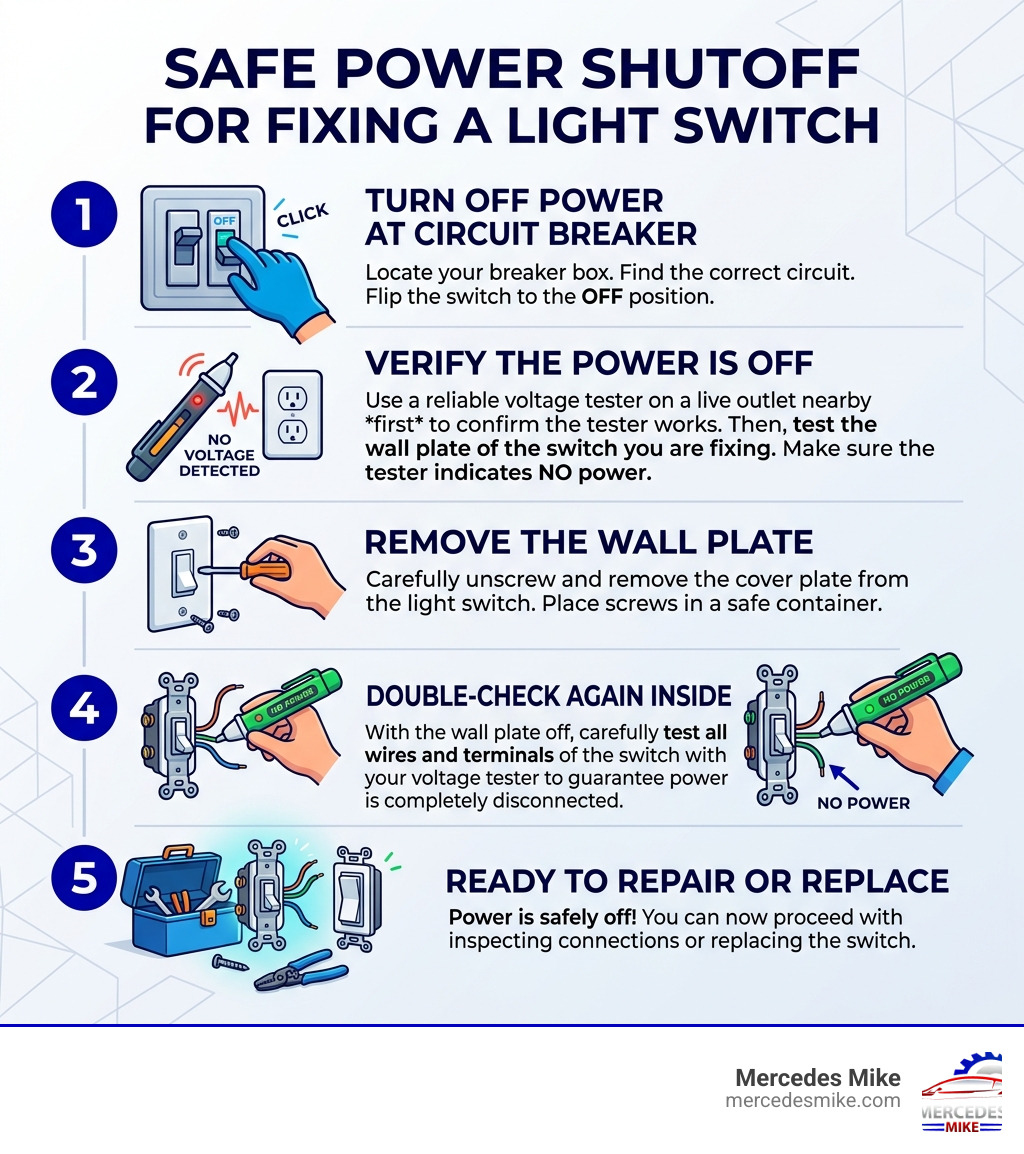
Turn off the power at your circuit breaker
Verify the power is off using a non-contact voltage tester
Remove the wall plate and inspect the switch and wiring
Tighten connections or replace the switch depending on what you find
Restore power and test the switch before securing everything back in place
Most light switch repairs take 30 minutes to 1.5 hours and cost as little as $25–$50 in parts — compared to $150 or more for a professional service call.
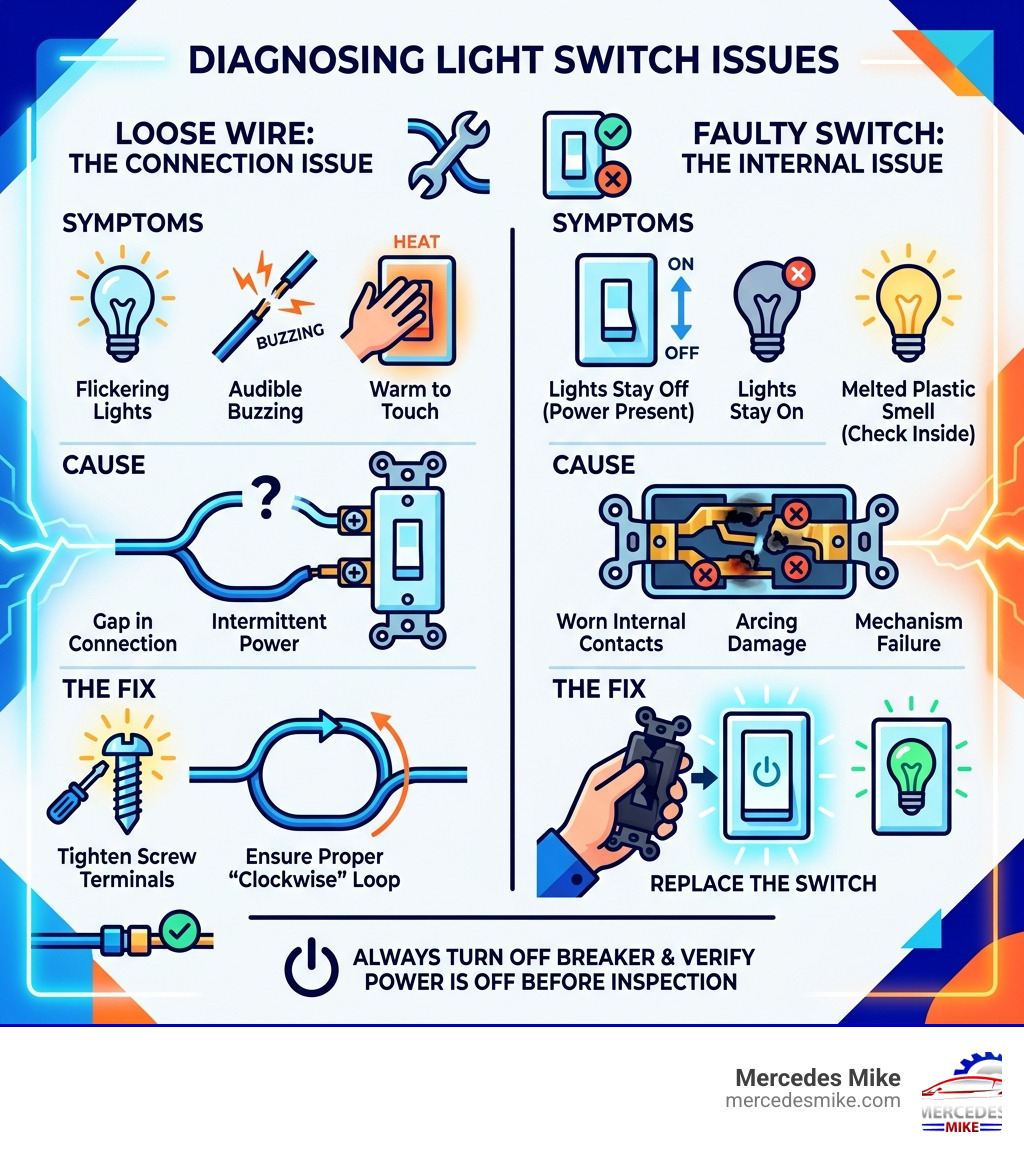
Light switches are among the most-used mechanical devices in any home. That constant use adds up. Most switches last anywhere from 5 to 20 years, depending on quality and how often they're used. When they start to fail, you'll notice it — flickering lights, a buzzing sound, a plate that feels warm to the touch, or a toggle that just feels wrong.
The good news? Most of these problems are straightforward to fix yourself, even if you've never done electrical work before. The key is knowing what you're dealing with and, above all, working safely.
Identifying When to Fix a Light Switch
Before we grab the toolbox, we need to determine if the switch is actually the culprit. Sometimes a "broken" switch is just a loose lightbulb or a tripped breaker. In our experience at Mercedes Mike, whether we are diagnosing a complex electrical issue in a Porsche or a simple wall switch in a Pompano Beach home, the symptoms tell the story.
According to Switch Repair | How to Repair Electrical, most electrical switches wear out from sheer mechanical fatigue. Here are the red flags that tell us it's time to fix light switch issues:
Flickering Lights: If the light stutters when you flip the switch or stays dim until you "jiggle" the toggle, the internal contacts are likely worn out.
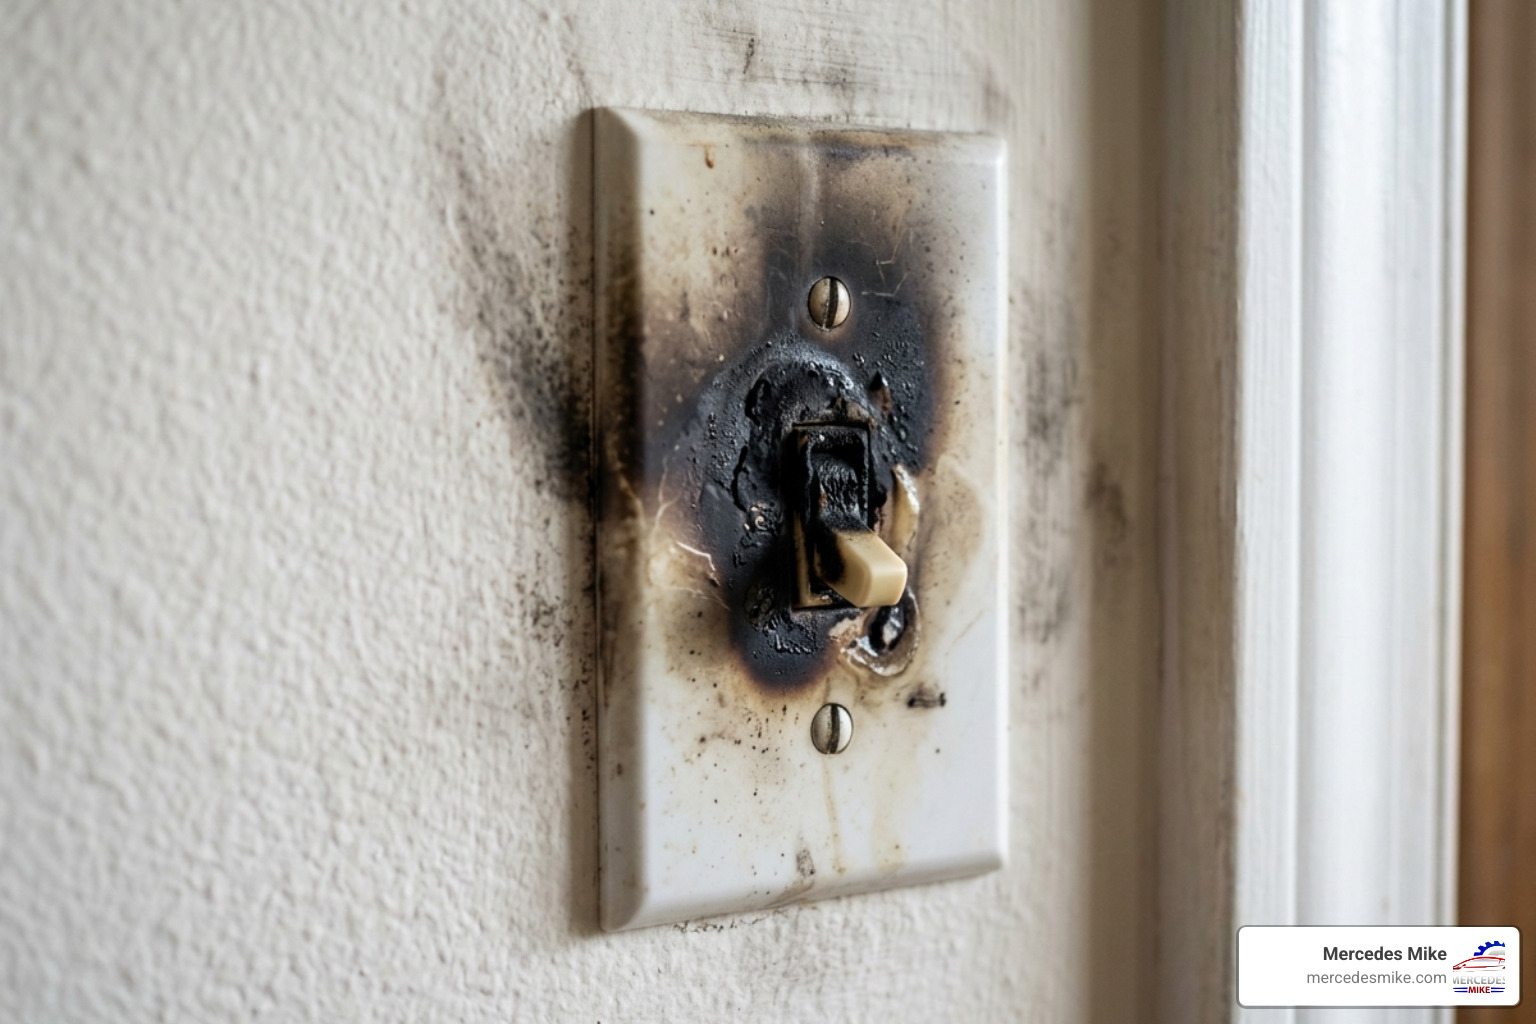
Noises (Buzzing, Popping, or Hissing): This is a serious sign. These sounds usually indicate "arcing," where electricity is literally jumping across a gap because of a loose connection or a broken internal part.
The "Warm" Touch: A switch plate should never feel hot. If it does, electricity is meeting resistance, which generates heat. This is a fire hazard waiting to happen.
Delayed Activation: You flip the switch, and the light takes a second or two to respond. This is often a sign of failing internal springs or brass contacts.
Loose or "Mushy" Toggle: If the switch doesn't "snap" into place anymore or feels like a wobbly tooth, the mechanical structure inside has snapped.
Essential Tools and Safety Precautions to Fix Light Switch
Working with electricity can be intimidating, but it is perfectly safe if we follow the right protocols. Think of it like working on a Mercedes-Benz engine; you wouldn't start pulling wires while the battery is connected, right?
Your DIY Electrical Kit
To fix light switch problems effectively, we recommend gathering these tools:
Non-contact voltage tester: This is our most important safety tool. It glows or chirps when it senses electricity.
Screwdrivers: You’ll need a flathead for the cover plate and a Phillips head for the switch itself.
Needle-nose pliers: Essential for bending wire into "hooks" to fit around screws.
Wire strippers: If the old wires are brittle or scorched, we’ll need to strip back the insulation to find fresh copper.
Electrical tape: For extra insulation.
Rubber-soled shoes: A pro tip from the electrical industry — wearing rubber soles helps insulate you from the ground, reducing shock risks.
Residential vs. Commercial Grade Switches
When you head to the hardware store in Deerfield Beach or Pompano, you’ll see different "grades" of switches. Here is how they compare:
Feature | Residential Grade | Commercial (Spec) Grade |
|---|---|---|
Durability | Rated for standard home use | Built for high-traffic areas |
Build Quality | Plastic ears, standard screws | Metal reinforced, heavy-duty terminals |
Lifespan | 5-10 years | 15-20+ years |
Cost | $1 - $3 | $5 - $10 |
We always suggest spending the extra few dollars for commercial-grade switches. They feel sturdier and last much longer.
Verifying the Power is Off
Never trust a label on a breaker panel blindly. Go to your panel, flip the breaker, then return to the switch. Try to turn the light on. If it stays off, you’re on the right track. However, the only way to be 100% sure is to remove the cover plate and use your non-contact voltage tester. Touch it to the side terminals of the switch. If it doesn't light up, the circuit is "dead" and safe to handle.
Testing for a Faulty Switch
If you aren't sure if the switch is broken or if the problem is the light fixture, you can use a continuity tester or a multimeter. With the switch removed from the wall (and power off!), touch the probes to the two brass terminals. Flip the switch to "On." If the tester lights up or the multimeter beeps, the switch is completing the circuit. If it stays silent, the internal mechanism is dead.
Step-by-Step Guide: How to Fix Light Switch Wiring
Now that we’ve confirmed the power is off and the switch is the problem, let's get to work.
1. Remove the Wall Plate and Switch
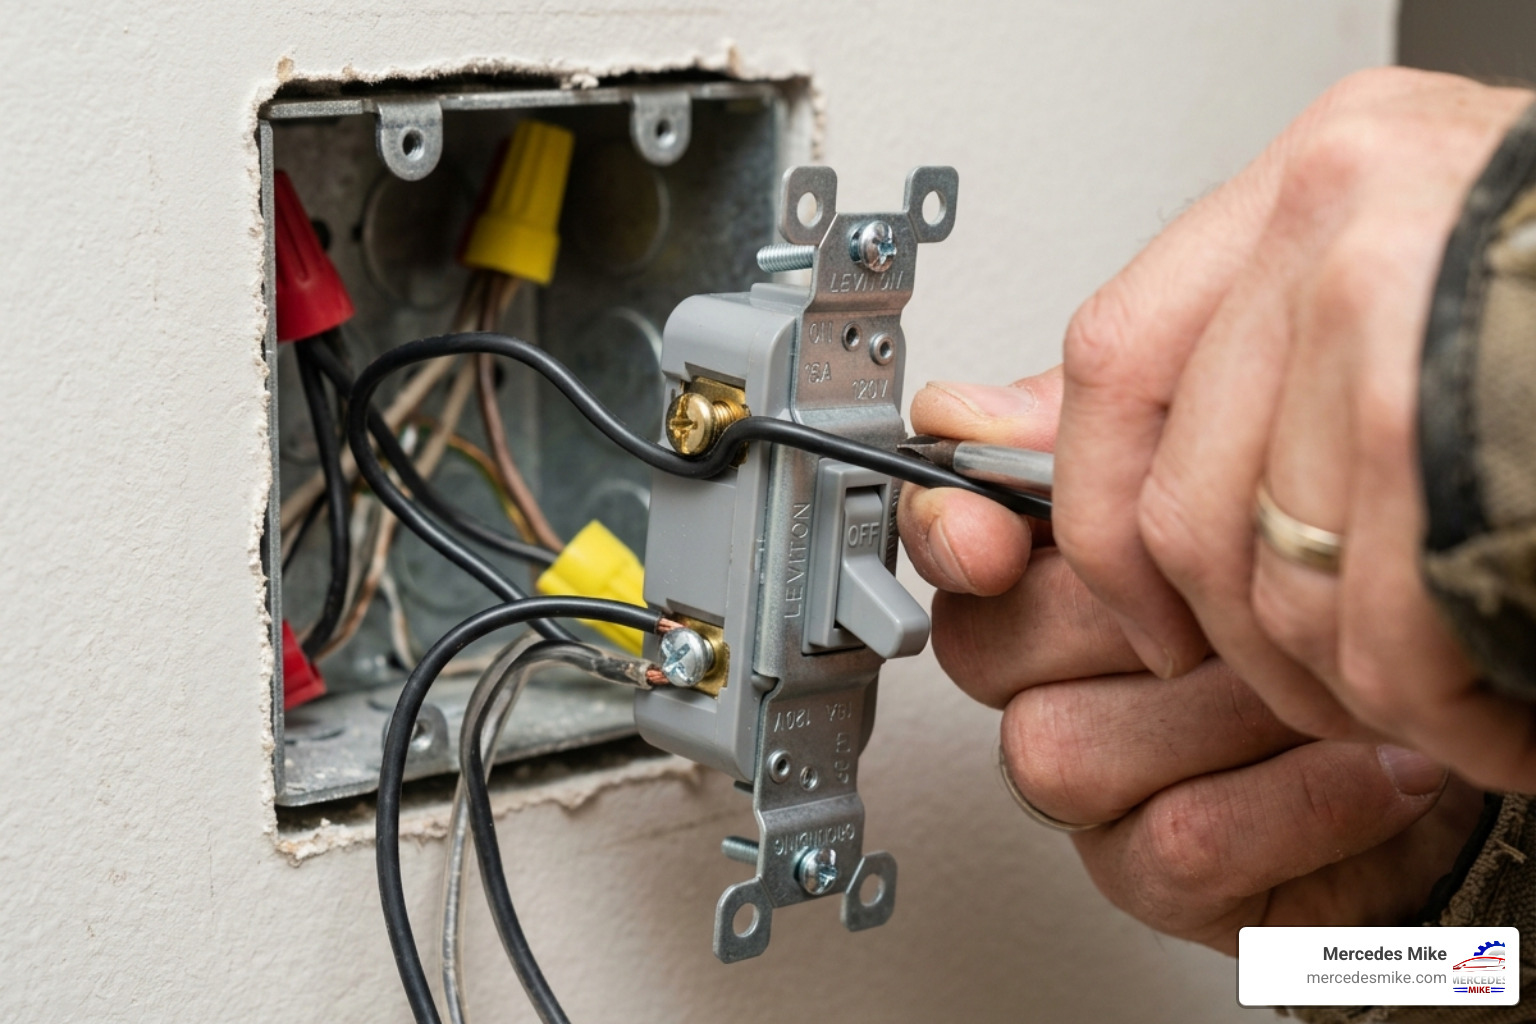
Use your flathead screwdriver to remove the cover plate. If the plate is "glued" to the wall by years of paint, don't just pull it — you’ll rip your drywall. Instead, use a razor blade to gently score the paint around the edge of the plate first. Once the plate is off, unscrew the two long screws holding the switch to the electrical box.
2. Document the Wiring
This is a step many beginners skip, but it's the most important! Take a clear photo of the wires with your phone. Note which wire goes to which screw. In a standard setup, you'll usually see two black wires and a bare copper or green wire.
3. Disconnect the Old Switch
Loosen the terminal screws and unhook the wires. If the wires are "back-stabbed" (pushed into holes in the back), you can usually release them by sticking a small screwdriver into the slot next to the hole. However, we recommend snipping those ends off and using the side-screw terminals on your new switch for a more secure connection.
4. Prepare the Wires
According to How to Fix a Light Switch in 9 Steps, you should have about 3/4 inch of bare copper exposed. Use your needle-nose pliers to bend the end of each wire into a "C" shaped hook.
5. Attach the New Switch
The Ground Wire: Attach the green or bare copper wire to the green screw.
The Hot Wires: Attach the two black wires to the two brass screws. It doesn't matter which black wire goes to which brass screw on a standard single-pole switch.
The "Clockwise" Rule: Always hook the wire around the screw in a clockwise direction. This way, when you tighten the screw, it pulls the wire tighter instead of pushing it off.
Replacing a Standard Single-Pole Switch to Fix Light Switch Issues
A single-pole switch is the most common type. It controls one light from one location. It’s the easiest to fix light switch problems on because there are only two main wires to worry about. Just remember: "Brass to Black, Green to Ground."
Troubleshooting a 3-Way or 4-Way Fix Light Switch Setup
If you have a light that is controlled by two different switches (like at the top and bottom of a staircase), you have a 3-way switch. These are trickier.
Identify the "Common" Terminal: One screw on a 3-way switch is darker than the others (usually black or labeled "COM").
Traveler Wires: The other two screws are for "traveler" wires that connect the two switches.
Pro Tip: Use masking tape to label the wire that was on the "Common" screw before you disconnect the old switch. If you mix these up, the switches won't work correctly.
Solving Common Issues: Loose, Hot, or Buzzing Switches
Sometimes you don't need a full replacement to fix light switch annoyances.
Fixing a Loose Switch Without Replacement
If your switch wobbles when you touch it, it’s likely because the electrical box is recessed too far into the wall. This is common in South Florida homes after a kitchen backsplash or new drywall is installed.
Turn off the power.
Pull the switch out slightly.
Slide "plastic spacers" (often called "caterpillars") onto the mounting screws behind the metal "ears" of the switch.
Tighten the switch back down. The spacers will bridge the gap and keep the switch flush against the wall plate. Learn more about this at How to Fix a Loose Light Switch | 10 Easy Steps (2026).
Addressing Heat and Buzzing
If your switch is buzzing, it’s usually because a wire has come loose from a terminal screw. This causes the electricity to "jump," creating heat and sound.
The Fix: Tighten the terminal screws. If the wire looks black or scorched, cut off the damaged section, strip it back to fresh copper, and reconnect it.
Dimmer Buzzing: If a dimmer switch buzzes, it’s often because you’re using non-dimmable LED bulbs. Check your bulb packaging!
Frequently Asked Questions about Light Switch Repair
Is it safe to DIY a light switch repair?
Yes, provided you turn off the breaker and verify the power is off with a tester. Electrical work is logical; if there is no power flowing, there is no danger of shock. However, if you see melted wires, smell smoke, or find aluminum wiring (common in some older Florida homes), it's time to call a pro.
Why is my new dimmer switch buzzing?
Dimmer switches are essentially "chopping" the electricity to lower the light level. If the bulb isn't designed for this, or if the dimmer is overloaded (too many bulbs on one circuit), it will vibrate and buzz. Always match the wattage of your bulbs to the rating on the dimmer.
When should I call a professional electrician?
While we love a good DIY project, you should call an expert if:
The wires inside the box are brittle and crumble when touched.
You find more than three wires and can't figure out the configuration.
The breaker trips immediately every time you turn the new switch on.
You see sparks inside the wall.
Conclusion
Learning how to fix light switch issues is an empowering skill for any homeowner in Pompano Beach or Deerfield Beach. It saves money, increases safety, and gives you a great sense of accomplishment. Whether it’s tightening a loose toggle or replacing an old flickering unit with a modern commercial-grade switch, most of these tasks are well within your reach.
At Mercedes Mike, we believe in doing things right the first time. Our technicians bring decades of experience and the latest tools to every automotive repair, and we encourage that same level of precision in your home maintenance. If you've mastered your home lighting and want that same expert care for your Mercedes, BMW, or Porsche, we are here to help.