
The Ins and Outs of Brake Replacement Cost & Process
Key Signs and Maintenance Intervals for Brake Service
Professional brake replacement generally costs between $115 and $270 per axle for brake pads, or $250 to $500 per axle for both pads and rotors. The core replacement process involves safely lifting the vehicle, dismounting the calipers, replacing worn pads and rotors, lubricating sliding hardware, and properly bedding the new friction material. Every time you depress your brake pedal, hydraulic force pushes your brake calipers to squeeze friction material directly against spinning metal discs. Over time, that friction wears away the pad material. Paying attention to early warning indicators prevents secondary damage to expensive hardware.
The primary signs that your vehicle requires immediate brake attention include:
Squealing or Chirping Noises: Most modern pads feature built-in acoustic wear indicators. These small metal tabs contact the spinning rotor when the friction material drops below approximately 3 mm, emitting a high-pitched warning before metal backing plates contact the rotor.
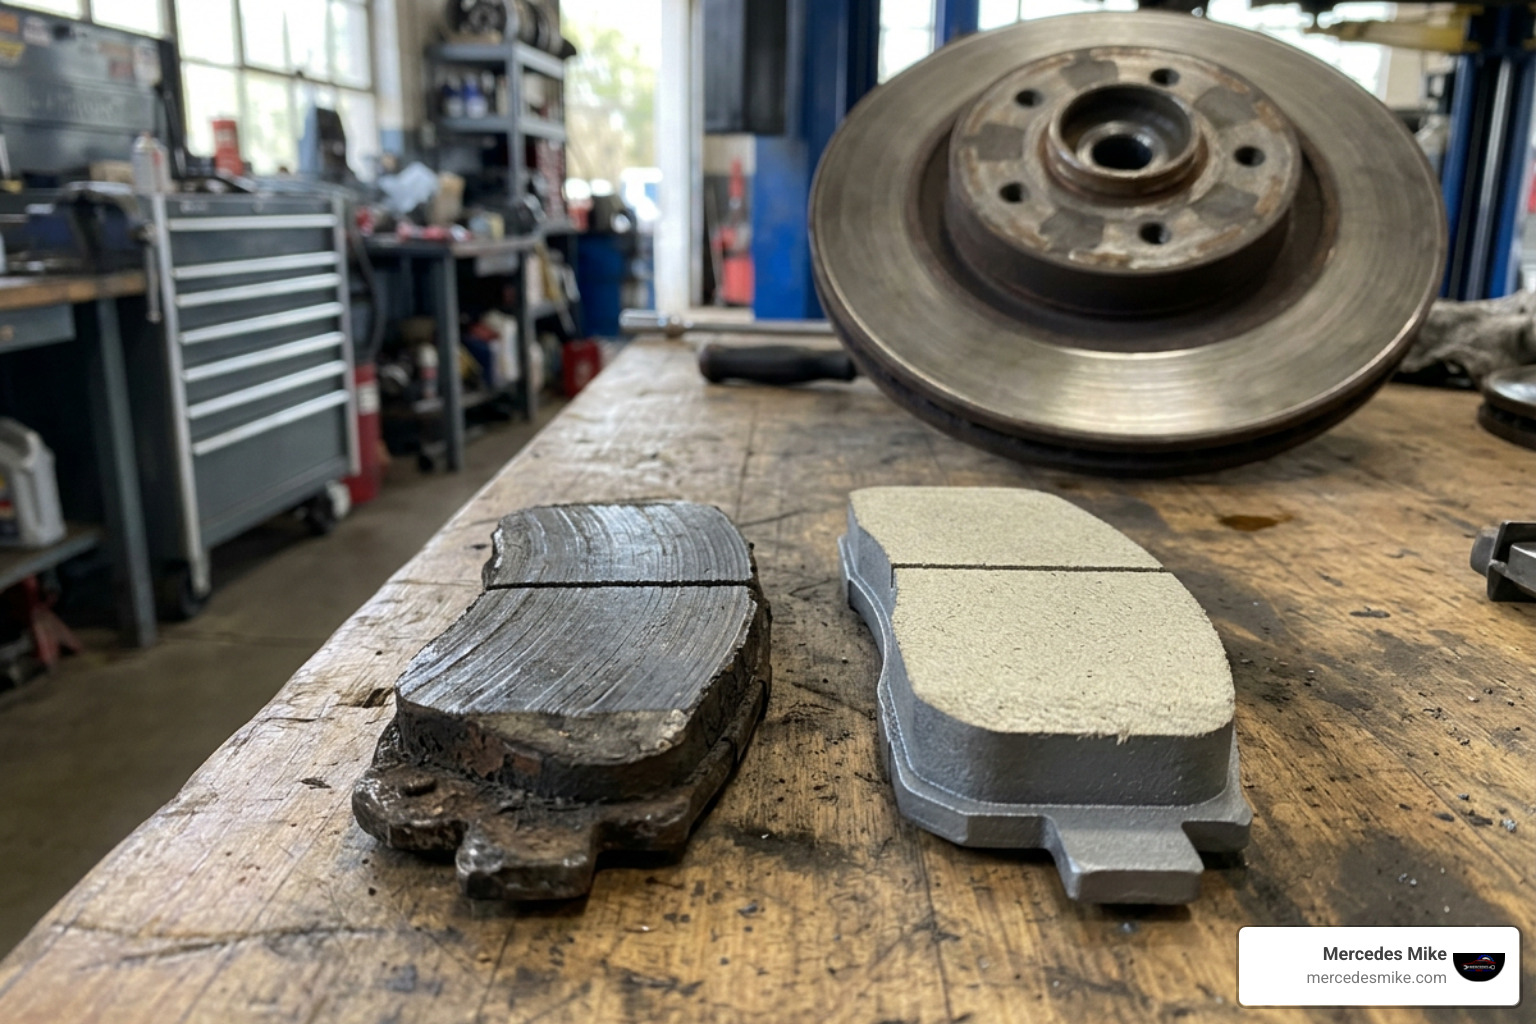
Metal-on-Metal Grinding: A deep, harsh scraping sound indicates that the friction lining has completely worn away. The steel backing plate is now contacting the cast-iron rotor, causing severe grooving and requiring immediate component replacement.
Steering Wheel Vibration and Pedal Pulsation: If your brake pedal pulses or the steering wheel shudders during moderate deceleration, the brake rotors have likely developed thickness variation (often referred to as warped rotors) or excessive lateral runout.
Extended Stopping Distances and Soft Pedal Feel: If your car takes noticeably longer to stop or the pedal sinks closer to the floorboard before biting, your pads may be overheated (glazed), worn thin, or your hydraulic system may contain degraded fluid.
Dashboard Warning Lights: Modern European vehicles utilize electronic wear sensors that trigger an instrument cluster warning when the pad lining reaches a predetermined threshold.
As a general rule, brake pads provide a lifespan between 30,000 and 70,000 miles, whereas brake rotors typically last between 50,000 and 70,000 miles. However, stop-and-go South Florida traffic, high ambient heat, and aggressive driving can accelerate this timeline. We recommend scheduling a comprehensive visual inspection at least once a year or every 12,000 miles to monitor pad thickness and fluid clarity. For a deeper breakdown of system health, see our Brake Repair Complete Guide 2026.
The Complete Guide to Brake Replacement: Pads, Rotors, and Hardware
Performing a complete brake overhaul requires mechanical precision, the proper equipment, and an uncompromising focus on safety. Whether you choose to tackle the job in your home garage or rely on a certified technician, understanding the workflow ensures the job is done right. For those taking the DIY route, you can follow an instructional resource like this guide on How to Change Your Car’s Brakes Yourself: DIY Auto Repair .
Required Tools and Equipment Checklist
Before lifting your vehicle, assemble the necessary tools:
Hydraulic floor jack (2-ton minimum rating) and heavy-duty jack stands
Wheel chocks to secure the non-lifted axle
Metric socket set, open-end wrenches, and breaker bar
Caliper piston compression tool, disc spreader, or heavy-duty C-clamp
Caliper hanger hooks or heavy-duty zip ties (never let a caliper dangle by its rubber brake line)
Calibrated torque wrench
Brake parts cleaner spray and stiff wire brush
High-temperature synthetic brake grease (lubricant for metal-to-metal slide contacts)
Replacement brake hardware clips, anti-rattle springs, and new wear sensors
Essential Preparation and Caliper Retraction Safety
Begin by parking the vehicle on a solid, level concrete surface. Place wheel chocks securely behind the tires on the axle that remains on the ground. Loosen the lug nuts on the wheels of the axle being serviced by one-half turn while the car is still on the pavement, then raise the vehicle using the factory lift points and support it securely on jack stands.
Open the hood and inspect the master cylinder fluid reservoir. Retracting the caliper pistons forces hydraulic fluid back up through the lines into the reservoir. If the fluid level is currently at the "MAX" line, use a clean syringe to remove a small amount of fluid so it does not overflow onto painted surfaces during piston compression.
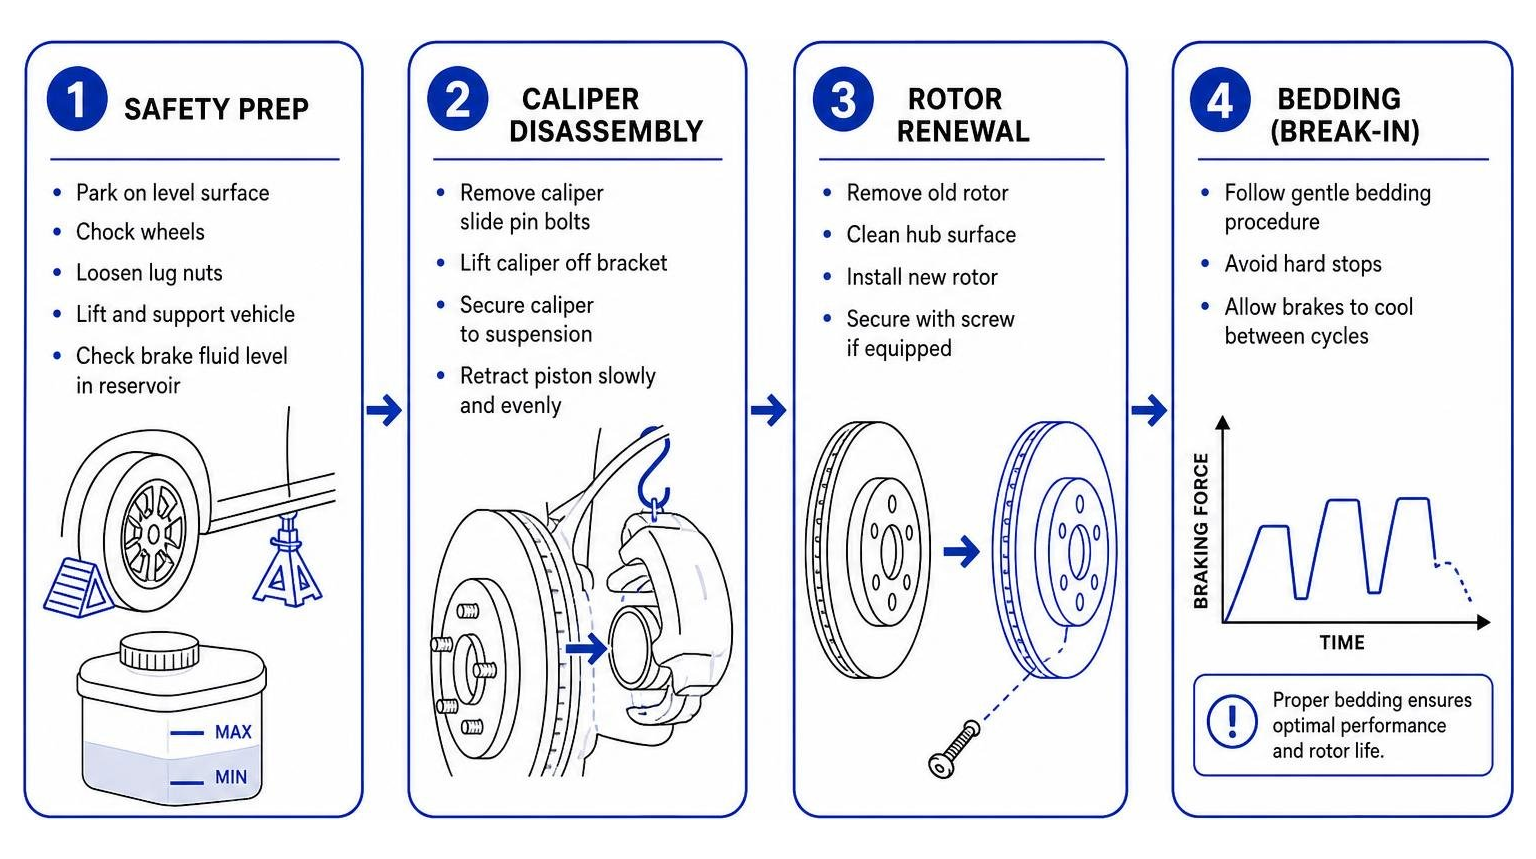
When retracting pistons, slow and steady pressure is critical. Rushing piston retraction can push back-pressure through the hydraulic lines, potentially damaging sensitive internal valves in the ABS modulator assembly. If your vehicle features an electronic parking brake (EPB) on the rear axle, place the system into "Service Mode" via your onboard diagnostic scanner or instrument cluster controls before attempting piston retraction; forcing these pistons manually without unlocking the electric actuator will destroy the caliper mechanism.
Step-by-Step DIY Brake Replacement Procedure
Remove Caliper Assembly: Remove the wheel and unbolt the caliper slide pin bolts. Lift the caliper body away from the bracket and immediately secure it to the suspension spring using an S-hook or zip tie. Never let the caliper hang freely by the rubber flexible brake hose.
Strip Hardware and Pads: Slide the worn brake pads out from the caliper bracket. Unbolt the caliper mounting bracket from the wheel hub assembly using your breaker bar and socket.
Remove and Replace Rotor: Remove the rotor retaining set screw (if equipped) using a Torx or Allen bit. If the rotor is rusted to the hub, tap the rotor hat gently with a dead-blow mallet to free it. Clean the wheel hub flange thoroughly with a wire brush to eliminate rust scale, as any debris behind the new rotor will cause lateral runout and pedal pulsation. Clean the protective shipping oil off your new rotor with brake cleaner before sliding it onto the hub.
Clean Bracket and Install New Hardware: Scrub the caliper bracket pad abutment areas with a wire brush. Install fresh stainless-steel abutment clips and apply a micro-thin layer of high-temperature brake grease to the clip contact points where the pad ears slide. Keep all lubricants strictly away from the rotor friction surface and the front face of the pads.
Install New Pads and Re-mount Caliper: Snap the new pads into the bracket clips. Retract the caliper piston using your compression tool, reinstall the bracket, and torque the bracket bolts to factory specifications. Fit the caliper over the new pads and tighten the slide pin bolts with a calibrated torque wrench.
Pressurize the System and Bed In: Before turning the ignition or shifting into gear, slowly pump the brake pedal 5 to 10 times until firm resistance returns. This seats the pistons against the pads. Check your reservoir fluid level, reinstall the wheels, and torque the lug nuts in a star pattern. Complete the job by following a proper bedding procedure: make 6 to 8 moderate decelerations from 45 mph down to 15 mph in rapid succession without coming to a complete stop, allowing the pads to evenly transfer a thin layer of friction material to the new rotor face.
Rotor Maintenance and Material Selection
Selecting the right friction formulation directly impacts your stopping capability, pedal feel, noise generation, and wheel cleanliness.
Pad Material Type | Operating Temperature Range | Dust Output | Noise Level | Wear Life | Best Suited For |
|---|---|---|---|---|---|
Ceramic | Up to 650°F | Very Low (Light Gray) | Minimal | 50,000 – 70,000 Miles | Daily commuters, luxury sedans, street driving |
Semi-Metallic | Up to 800°F+ | Moderate to High | Low to Moderate | 30,000 – 50,000 Miles | Performance driving, heavy SUVs, towing |
Organic (NAO) | Up to 500°F | Moderate (Dark) | Very Low | 20,000 – 35,000 Miles | Light-duty small vehicles, vintage classics |
Choosing the Right Pad Material for Driving Conditions
Ceramic brake pads combine dense ceramic compounds with embedded copper or brass fibers. They offer clean, virtually silent operation and provide reliable, consistent bite under everyday driving temperatures. Because they produce an unobtrusive, light-colored dust that does not adhere aggressively to alloy wheels, they remain the premier choice for European luxury daily drivers.
Semi-metallic pads incorporate 30% to 65% steel, iron, and graphite fibers bound together. This structure provides exceptional thermal dissipation and superior cold bite under extreme loads. If you regularly tow heavy trailers, navigate mountain descents, or participate in track events, semi-metallic pads deliver the necessary resistance to thermal brake fade.
Non-Asbestos Organic (NAO) pads are crafted from organic fibers such as glass, rubber, and carbon bound with high-temperature resins. While soft on rotors and exceptionally quiet, they wear out much faster and cannot handle the high thermal loads generated by heavier, high-horsepower vehicles.
Rotor Resurfacing vs. Complete Rotor Renewal
When replacing pads, you must address the condition of the brake rotors. You have two pathways: machining the existing rotors on an on-car or bench brake lathe, or installing brand-new discs.
Resurfacing cuts away a fine layer of iron from both friction faces, restoring a perfectly flat, non-directional finish that allows new pads to seat properly. However, resurfacing is only viable if the rotor thickness remains comfortably above the manufacturer's stamped "Discard Minimum Thickness" (Min Thk) specification after machining.
If a rotor is deeply grooved, shows blue heat spots (metallurgical hard spots), has developed stress micro-cracking, or has thinned near its minimum service limit, machining is unsafe. Modern European vehicles typically use lightweight, high-carbon rotors engineered close to minimum thickness tolerances from the factory. In these applications, a full Brake Disc Replacement is the standard best practice to maintain safety, correct thermal dissipation, and prevent premature pedal pulsation.
Analyzing Professional and DIY Service Expenses
Understanding the price dynamics between sourcing parts for a home installation versus hiring an independent specialty repair shop helps you budget effectively for maintenance.
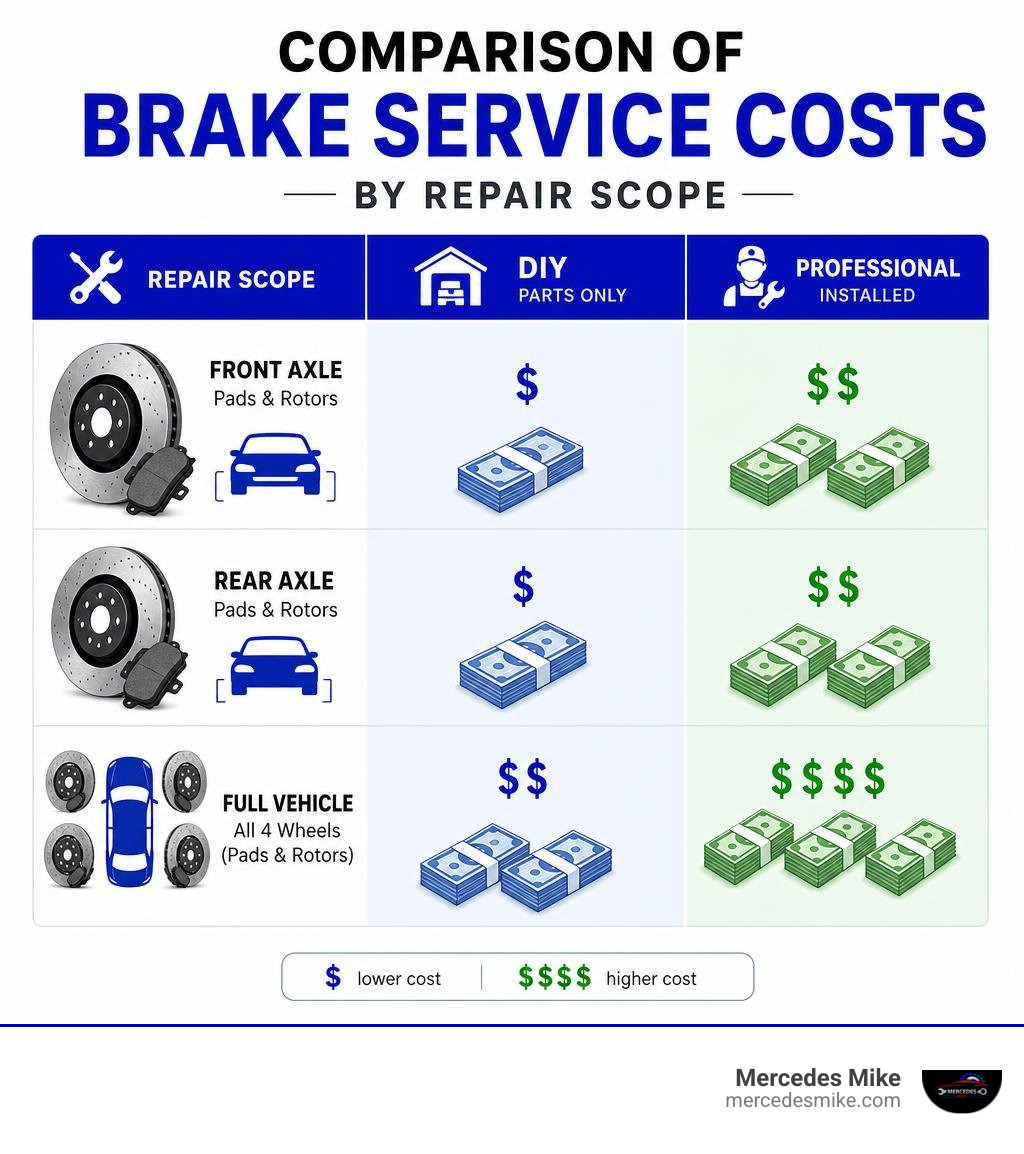
Professional vs. DIY Brake Replacement Cost Breakdown
Standard professional rates vary based on whether you are servicing a single axle or the entire vehicle, as well as the complexity of the braking system:
Brake Pad Replacement (Per Axle): Professional repair generally ranges between $115 and $270 per axle for standard passenger vehicles.
Pads and Rotors (Per Axle): Replacing both pads and rotors simultaneously typically costs between $250 and $500 per axle, inclusive of parts and professional labor.
Complete System Overhaul: A full service involving front and rear pads, four new rotors, fluid flush, and caliper service generally falls between $300 and $800, though specialized European vehicles with multi-piston fixed calipers or high-performance composite rotors can exceed $1,000.
DIY Parts Only: Purchasing your own components generally costs $35 to $150 for a quality pad set and $30 to $75 per standard replacement rotor, yielding substantial labor savings if you possess the tools and technical know-how.
Brake Fluid Exchange and Hydraulic System Care
Brake fluid is hygroscopic, meaning it constantly absorbs moisture from the surrounding atmosphere through microscopic pores in flexible rubber brake hoses and the reservoir cap seal. Over a 2-to-3-year window, moisture content can easily surpass 3%, significantly lowering the fluid's boiling point.
During repeated hard stops, moisture-laden fluid can boil inside the calipers, creating compressible steam pockets that result in a dangerous condition known as vapor lock—where the pedal drops straight to the floor with zero braking resistance. Furthermore, internal water accumulation causes galvanic corrosion within the master cylinder pistons, ABS hydraulic actuators, and caliper bores. Regular fluid exchanges preserve hydraulic seals and maintain a crisp, responsive pedal feel. If internal bypass leakage develops within the hydraulic pressure chamber, addressing the issue via Brake Master Cylinder Repair is essential to restore proper pressure distribution.
Frequently Asked Questions About Brake Maintenance
What is included in a standard comprehensive brake inspection?
A comprehensive inspection involves a multi-point mechanical and hydraulic evaluation:
Measuring pad friction lining thickness on both inboard and outboard pads across all wheels.
Checking rotor thickness with an outside micrometer and verifying lateral runout using a dial indicator.
Inspecting caliper slide pins, rubber dust boots, and guide bushings for proper lubrication and free movement.
Testing brake fluid moisture content and boiling point using an electronic refractometer or test strip.
Visually inspecting flexible rubber hydraulic lines for dry rot, cracking, kinks, or fluid seepage.
Checking parking brake adjustment and verifying electronic actuator functionality.
How do I determine if my rotors should be machined or replaced?
Measure the rotor thickness at several points along the friction ring using a precision micrometer. Compare this measurement to the factory minimum thickness specification stamped directly into the rotor hat or edge. If the rotor's current thickness minus the material depth needed to clean up grooves falls below the discard minimum, it cannot be machined. Furthermore, if you observe deep heat checking, severe rust scaling on the internal cooling vanes, or hot-spot discoloration, replace the rotors outright.
Why do new brake pads sometimes make a squeaking sound?
New brake pad noise is typically caused by high-frequency harmonic vibrations between the backing plate, caliper bracket, and piston face. Common causes include:
Missing, damaged, or improperly seated stainless-steel anti-squeal shims.
Failure to clean and lubricate the pad abutment ears and caliper slide pins with high-temperature brake grease.
Skipping the recommended pad bed-in procedure, leading to an uneven friction film transfer or glazed pad surface.
Installing budget friction pads that lack chamfered edges and sound-dampening slot designs.
Reusing an old, glazed rotor surface without scuffing or resurfacing it prior to new pad installation.
Conclusion
Your vehicle's braking system is its single most critical safety assembly. Staying attentive to warning signs—like high-pitched squealers, steering vibrations, or soft pedal travel—protects your safety and keeps routine maintenance costs manageable. Whether you are replacing standard wear items or undertaking a complete hydraulic refresh, using premium components that match OEM specifications guarantees the stopping power engineered into your vehicle.
At Mercedes Mike, our decades-experienced technicians use the latest diagnostic and mechanical tools to service, repair, and maintain German cars across Pompano Beach, Deerfield Beach, and throughout South Florida. Located at 882 NE 41st Court (just off N Dixie Hwy), we provide the exacting standard of care your precision automobile deserves. When your vehicle requires maintenance, schedule our professional German auto repair services to ensure complete safety and peak road performance.